Getting the Perfect Powder Coating Finish Starts with the Right System—And the Right Partner
At GAT Systems, we do more than just supply equipment—we design complete, turnkey Paint Finishing Systems tailored to your specific production goals. Our experienced engineering team works hand-in-hand with your in-house engineers to ensure every powder coating solution we deliver is fully aligned with your technical specs, layout requirements, and production goals.
From part zoning and workflow optimization to airflow and energy efficiency, GAT’s engineering team orchestrates every component—from pre-treatment and racking to curing ovens and finishing touches—into a streamlined, high-performance system.
Our job doesn’t end with equipment delivery. We ensure that your entire powder coating setup is optimized for maximum performance, safety, and long-term value. Whether you’re building a new line or upgrading an existing one, GAT Systems delivers engineered solutions that just work.
Getting a perfect finish with powder coating isn’t just about having good powder. It’s about having the right gear, too. Think of it like baking a cake; you need more than just flour. You need the right oven, mixing bowls, and even a good whisk. The same goes for powder coating. Having the right Powder Coating Equipment can make all the difference, helping you avoid common problems and get that smooth, durable finish you’re aiming for. This checklist covers 12 essential pieces of Powder Coating Equipment that will help you achieve top-notch results every time.
Key Takeaways
- Good grounding is super important for an even coat. Don’t skip this step.
- Regular maintenance of your Powder Coating Equipment saves you headaches and money down the road.
- Always check your film thickness. Too much or too little can mess up the finish.
- Pre-treatment isn’t just an extra step; it’s vital for paint sticking well.
- Having the right tools for touch-ups can fix small mistakes without redoing everything.
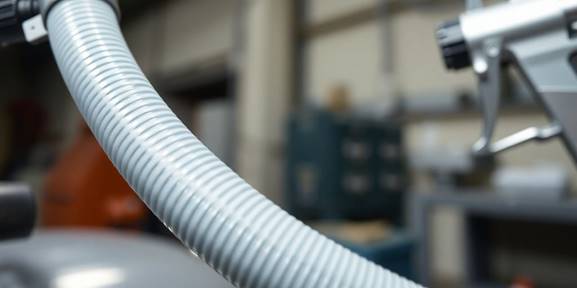
1. Powder Delivery
Getting the powder from its container to the spray gun seems simple, but it’s a critical step. Consistent and controlled powder delivery is key to achieving a uniform coating thickness and finish. Several components work together to make this happen, and understanding how they function is important.
- Feed Hopper: This is where the powder starts its journey. A good hopper will keep the powder fluidized, preventing clumping and ensuring a steady flow. Proper storage and fluidization are important for consistent results.
- Venturi Pump: This uses compressed air to create a vacuum, pulling the powder from the hopper and into the delivery hose. Balancing the airflow is important to avoid surges or inconsistent powder flow. IPCO’s extrusion technology can help with consistent powder flow.
- Powder Hose: The hose carries the powder to the spray gun. Keep the hose as short as possible to avoid restrictions and impact fusion.
Maintaining consistent powder flow is essential for a quality finish. Factors like humidity and powder age can affect fluidization, so it’s important to monitor and adjust your equipment accordingly.
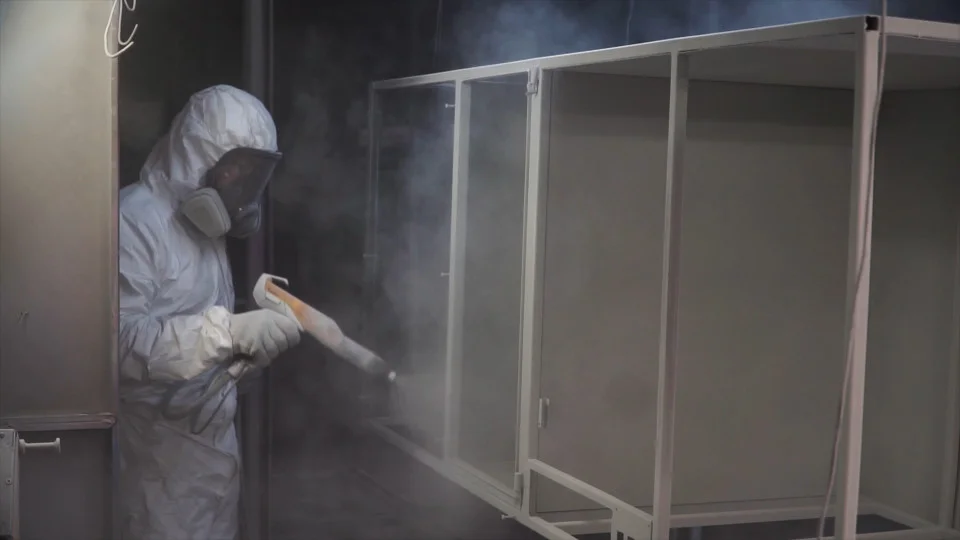
2. Spray Gun
The spray gun is a critical piece of equipment in the powder coating process. It’s responsible for delivering the powder to the part being coated and imparting an electrostatic charge. This charge helps the powder adhere to the grounded workpiece, resulting in a uniform coating. Getting the right spray gun and settings is key to a flawless finish.
There are a few things to consider when choosing a spray gun. First, you need to decide between a corona charging gun and a tribo charging gun. Corona guns are more common and offer more flexibility in terms of adjusting the spray pattern and powder volume. Tribo guns, on the other hand, charge the powder through friction, which can result in better penetration into recessed areas. The electrostatic charge is imparted with voltage, called corona charging, or by frictional contact with the inside of the gun barrel, called tribo charging.
Another important factor is the gun’s air pressure. Most powder coating guns need only 5-10 psi of compressed air. This helps reduce overspray and ensures uniform powder distribution with strong adhesion. It’s also important to make sure that the gun is properly grounded to prevent static buildup.
Proper maintenance of the spray gun is also essential. This includes regularly cleaning the gun and replacing worn parts. Worn parts can lead to poor powder flow and increased maintenance problems. Inspecting and cleaning powder pumps regularly is also important.
Here’s a list of things to keep in mind:
- Choose the right type of gun for your application.
- Adjust the air pressure and powder volume to achieve the desired coating thickness.
- Make sure the gun is properly grounded.
- Clean the gun regularly and replace worn parts.
Properly adjusting the spray gun for part geometry and density is crucial to avoid issues like dry-spray, runs, light coats, and excessive film thickness.Air flow patterns, powder volume, velocity, and voltage level can be adjusted to accommodate different parts and powders.
3. Curing Oven
The curing oven is where the magic truly happens. After the powder is applied, the coated parts need to be baked at a specific temperature for a set amount of time to achieve a durable, flawless finish. The oven ensures the powder melts, flows, and chemically reacts to form a hard, resilient coating. Think of it as the final step that transforms loose powder into a protective shield.
Choosing the right oven is important. Factors like the size of your parts, production volume, and the type of powder you’re using will all influence your decision. A too-small oven will limit your capabilities, while an inefficient oven can drive up energy costs. It’s a balance.
Here are some things to keep in mind:
- Temperature Control: The oven needs to maintain a consistent and accurate temperature throughout the curing cycle. Fluctuations can lead to uneven curing, affecting the coating’s appearance and performance.
- Air Circulation: Proper airflow is essential for even heat distribution. This prevents hot spots or cold spots that can cause defects.
- Size and Capacity: Make sure the oven is large enough to accommodate your largest parts and handle your production volume. Consider future growth when making your selection.
A good practice is to run a temperature-recording device, like a Data Paq, through the oven monthly. This helps identify any hot or cold spots and ensures the oven is performing as expected. This is especially important if you notice light-colored powders yellowing, which can indicate excessive temperature stress or a dirty oven environment. Also, remember to check the custom finishing systems to see if they fit your needs.
Also, the oven size depends on the product size and mass, and the production volume. The oven must be sized to handle the largest part with enough burner capacity to handle the heaviest load of product. Typically, a convection powder cure oven should be around 20 minutes in cycle time. A batch oven cycle time will typically be around 15 to 20 minutes. The oven interior should be big enough to handle 20 minutes worth of production. In some cases, two ovens are necessary to maintain a flow of work.
4. Pre-Treatment
Pre-treatment is a critical step often overlooked, but it’s where a durable, high-quality powder coating finish really begins. It’s all about preparing the surface to ensure the powder coating adheres properly and resists corrosion over time. Think of it as the foundation for a house – if it’s not solid, everything else will eventually crumble. I’ve seen so many projects fail simply because the pre-treatment was rushed or skipped entirely. Don’t make that mistake!
- Removes dirt, oil, and contaminants.
- Creates a surface profile for better adhesion.
- Inhibits corrosion.
Skipping or skimping on pre-treatment is like building a house on sand. It might look okay at first, but it won’t last. Take the time to do it right, and you’ll be rewarded with a finish that looks great and stands the test of time.
Different materials require different pre-treatment methods. For example, aluminum often benefits from chromate conversion coating, while steel might need phosphating. Choosing the right method is key to success. Also, make sure to check your equipment regularly.
Here’s a basic overview of common pre-treatment steps:
- Cleaning: Removing any surface contaminants like oil, grease, dirt, and scale. This can involve solvents, detergents, or even abrasive blasting.
- Rinsing: Thoroughly rinsing the surface to remove any residual cleaning agents. This is important to prevent interference with subsequent treatment steps.
- Chemical Treatment: Applying a chemical coating to improve adhesion and corrosion resistance. Common treatments include phosphating for steel and chromating for aluminum.
- Final Rinse: A final rinse, often with deionized water, to remove any remaining chemical residue.
- Drying: Thoroughly drying the part to prevent flash rusting or other issues before powder coating.
5. Racking
Racking is a seriously important part of the powder coating process that often gets overlooked. Think of your racks as specialized tools. Proper rack design and maintenance are key to achieving a high-quality finish and efficient operation. A well-designed rack ensures parts are held securely, positioned correctly for coating, and properly grounded.
- Sturdy construction is a must for racks used in an industrial setting.
- Racks should prevent parts from swinging and hitting each other in the oven, which can cause blemishes.
- Tubing used for rack frames should be designed to prevent water from being trapped, as this can cause staining during curing.
Racks should be designed to ensure proper drainage during the washing process and optimal presentation of parts to the spray guns. The goal is to present the “A” surfaces of the part as squarely as possible to the guns.
Rack Design Considerations
When designing a powder coating rack, the first thing to figure out is the best position for the part. This is important for drainage during washing and for good powder application. Parts should be angled so that any holes, pockets, or shelves face downwards to allow for proper drainage. Sometimes, you might even need to add extra holes during manufacturing to help with drainage.
- The most important part of the rack is the clip or contact point.
- A specialized clip can hold the part rigidly, ensuring it stays on the rack during washing and powder coating.
- The clip should touch the part in the same location every time to maintain a powder-free contact point and improve grounding.
Rack Maintenance
Rack maintenance is super important for safe operation. Contacts need to be clean to avoid resistance to ground. How often you strip the racks depends, but it should be often enough to keep a good ground. You should always have enough racks so you can spare some for stripping. Broken contacts should be fixed regularly, and racks with empty hooks should be stripped before reuse. Good grounding practices are essential to eliminate the risk of arcing, which can cause ignition. Everything in the area must be grounded through a connection to a ground stake in the earth. Regular ground checks are a must. Efficient ground is measured as less than one megohm of resistance between the part and ground. Consider using an Axis Anchor for hanging heavy objects.
Rack Stripping
There’s no set number of times a powder rack can be used before it needs stripping. Powder buildup insulates the steel surface, which can actually help the process by not competing with the parts for powder. However, stripping is needed when:
- The rack contact isn’t providing good ground because of powder buildup.
- The rack has so much buildup that it’s starting to crack.
Contacts coated with powder can’t provide a good path to ground, and cracked powder buildup can drop contamination onto parts. Heavy buildup can also interfere with part attachment and add to the conveyor load.
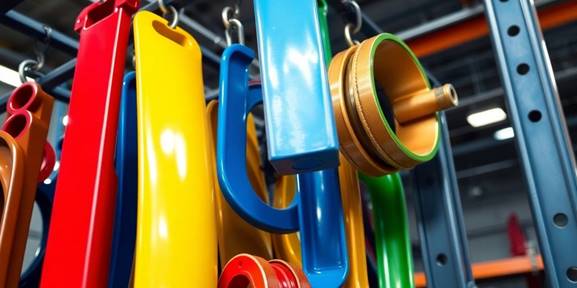
6. Hangers
Hangers are surprisingly important in powder coating. You might not think about them much, but they directly impact the quality of your finish and how efficiently you can coat parts. Choosing the right hangers can save you time and money in the long run.
- Material Matters: Hangers should be made from a conductive material, like copper or steel, to ensure proper grounding. This is critical for powder adhesion.
- Size and Shape: Select hangers that can securely hold the parts without causing them to overlap or touch. Different shapes and sizes are needed for different parts.
- Durability: Invest in hangers that can withstand repeated use and the high temperatures of the curing oven. Cheap hangers will bend and break, costing you more in the long run.
Proper hanger selection and maintenance are key to achieving a consistent and high-quality powder coat finish. Regularly inspect hangers for damage or wear and replace them as needed to avoid coating defects.
Think about the weight and geometry of your parts. Are they heavy? Do they have intricate shapes? The right hanger will make all the difference. Don’t skimp on this seemingly small detail; it’s a big deal for powder coating quality.
7. Air Supply
An adequate and clean air supply is absolutely necessary for powder coating. It powers the spray gun, helps with powder delivery, and ensures proper ventilation. Skimping on this aspect can lead to inconsistent finishes and safety hazards. Let’s dive into what you need to consider.
Air Compressor
First and foremost, you’ll need an air compressor. The size and type depend on the scale of your operation. For small, occasional projects, a smaller compressor for powder coating might suffice. However, for larger or continuous use, you’ll want a more robust industrial-grade compressor. Make sure it can deliver the CFM (cubic feet per minute) and PSI (pounds per square inch) required by your spray gun and other equipment. Insufficient air pressure leads to poor powder flow and an uneven coating.
Air Lines and Fittings
Don’t underestimate the importance of quality air lines and fittings. Use lines that are rated for the pressure your compressor delivers. Leaks in the lines will reduce pressure and cause your compressor to work harder, shortening its lifespan. Use proper fittings to ensure a tight, secure connection. Consider using quick-disconnect fittings for easy setup and breakdown.
Air Filtration and Drying
Clean, dry air is critical. Moisture and oil in the air supply can contaminate the powder and ruin the finish. Invest in a good filtration system that includes:
- A coalescing filter to remove oil and water droplets.
- A desiccant dryer to remove moisture vapor.
- A particulate filter to remove dust and other contaminants.
Regularly check and maintain your filters. Replace them as needed to ensure optimal performance. Contaminated air can lead to fisheyes, pinholes, and other defects in the powder coating.
Air Regulator
An air regulator is essential for maintaining a consistent air pressure to the spray gun. This allows you to fine-tune the powder flow and achieve the desired coating thickness. Most spray guns have a built-in regulator, but it’s often beneficial to have a separate, high-quality regulator closer to the compressor for more precise control.
Air Make-Up Unit (AMU)
For larger operations, especially those with enclosed spray booths or curing ovens, an Air Make-Up Unit (AMU) is crucial. The AMU replaces the air exhausted by the booth and oven, maintaining proper air balance and preventing negative pressure in the building. This ensures proper ventilation, worker comfort, and prevents dirt infiltration. An AMU also helps to maintain a consistent temperature, which is important for the curing process.
8. Grounding Equipment
Grounding is absolutely critical in powder coating. Without proper grounding, you’re asking for trouble – both in terms of finish quality and safety. Think of it like this: the powder needs a clear path to ground to be attracted to the part effectively. If that path is blocked or weak, the powder will go elsewhere, leading to uneven coating or even sparks.
It’s easy to overlook, but consistently checking and maintaining your grounding system is a must. Here’s what you need to keep in mind:
- Grounding Wires: Use heavy-gauge wires to connect all components – booth, oven, parts – to a central grounding point. Make sure connections are tight and free of corrosion.
- Racks and Hangers: These are your primary contact points. Keep them clean and free of powder buildup. Consider using specialized powder coating racks with sharp contact points for better grounding.
- Testing Equipment: A reliable ohmmeter is essential. Regularly test the resistance between the part and ground. Ideally, you want a resistance of less than 1 megohm. Anything higher indicates a problem.
Poor grounding can lead to a whole host of issues: inconsistent film thickness, Faraday cage effect (where powder doesn’t reach recessed areas), and even the risk of fire. It’s not worth the risk – invest in good grounding equipment and make regular checks a part of your routine.
Think of grounding like the foundation of a house. If it’s weak, everything else will suffer. Don’t skimp on this step!
9. Film Thickness Gauge
Getting the right film thickness is super important for a good powder coating job. Too thin, and you might see the metal underneath or not get the protection you need. Too thick, and you could have color or gloss issues, or even waste money. That’s why a film thickness gauge is a must-have.
These gauges let you measure the thickness of the coating, usually in mils or microns. It’s a great way to keep an eye on your process and make sure everything is consistent. There are different types out there, some for steel and others for metals like aluminum, copper, or brass.
Using a film thickness gauge before curing can save you a lot of headaches. If you catch a problem early, you can adjust your application and avoid having to rework or scrap parts later. This not only saves time and money but also helps maintain the quality of your powder coating.
Here’s a quick rundown of some common types:
- Magnetic Gauges: These are great for steel surfaces. They’re quick, accurate, and don’t damage the coating.
- Eddy Current Gauges: These are used for non-magnetic metals. They measure the strength of eddy currents in the metal to determine the thickness.
- Ultrasonic Gauges: These are non-destructive and can even be used on uncured powder to predict the final cured thickness.
Micrometers can also be used, but they require access to both sides of the coated part. Also, keep in mind that you can measure before or after the curing process. Measuring dry applied powder helps ensure correct cured film thickness. This allows the application system to be set up and fine-tuned prior to curing. In turn, this will reduce the amount of scrap and over-spray. Accurate predictions help avoid stripping and re-coating which can cause problems with adhesion and coating integrity.
10. Maintenance Tools
Let’s be real, things break. And when they do, especially in a powder coating setup, you need to be ready. Having the right maintenance tools on hand isn’t just about fixing problems; it’s about preventing them in the first place. A well-maintained system produces better results and lasts longer. Think of it as an investment in your equipment and your finished product. Planned maintenance is key to keeping your powder coating system running smoothly.
- Wrench Set: A comprehensive set of wrenches (both metric and standard) is essential for tightening, loosening, and adjusting various components.
- Screwdriver Set: Different types and sizes of screwdrivers (Phillips head, flat head, etc.) are needed for accessing and securing parts.
- Multimeter: For diagnosing electrical issues, a multimeter is invaluable. It helps you check voltage, current, and resistance.
- Lubricants: Keeping moving parts properly lubricated reduces friction and wear. Use appropriate lubricants for different components.
- Cleaning Brushes: Various brushes are needed for cleaning nozzles, filters, and other parts of the equipment. Regular cleaning prevents clogs and ensures optimal performance.
A good maintenance program involves more than just fixing things when they break. It’s about having a schedule for cleaning, adjusting, and repairing system components. This includes determining the time, materials, and people required for each job and assigning these tasks as a regular part of the maintenance team’s responsibilities. Line operators can often perform basic maintenance tasks at the end of each shift.
Having the right tools and a proactive approach to maintenance will save you time, money, and headaches in the long run. Don’t skimp on this aspect of your powder coating setup. Consistent maintenance leads to consistent results.
11. Touch-Up Paint
Okay, so you’ve got your powder coating all done, and it looks pretty good… except for that one little spot. Or maybe a scratch happened during assembly. That’s where touch-up paint comes in super handy. It’s not just about aesthetics; it’s about maintaining the integrity of the coating and preventing corrosion in the long run.
Touch-up paint is your friend when dealing with minor imperfections. It’s way easier than redoing an entire piece, and it can save you a ton of time and money.
Think of it as a quick fix for those little blemishes that inevitably pop up. You can get it in aerosol cans, which are great for small areas, or in liquid form for brush application. The key is to match the color and finish as closely as possible to your original powder coating.
Here’s a few things to keep in mind:
- Color Matching: Get the right color. Seriously. A slightly off shade will be way more noticeable than the original scratch. satin black touch-up paint is a good option for some applications.
- Surface Prep: Clean the area before applying the paint. Remove any loose debris or rust. A little bit of prep goes a long way.
- Application: Apply thin coats. Multiple thin coats are better than one thick, gloppy one. Let each coat dry before applying the next.
- Cure Time: Allow the touch-up paint to fully cure before handling the part. Check the manufacturer’s instructions for cure times.
Touch-up paint is a must-have for any powder coating setup. It’s a simple, effective way to keep your finished products looking their best. It’s also way cheaper than having to redo a whole job because of a tiny scratch. Plus, it’s just good practice to have it on hand for those inevitable little mishaps. Think of it as insurance for your powder coating job.
12. Cleaning Supplies
Keeping your powder coating equipment clean is just as important as using it correctly. A clean workspace and well-maintained tools will not only extend the life of your equipment but also ensure consistent, high-quality finishes. Let’s face it, nobody wants specks of old powder ruining a fresh coat!
- Solvents and Degreasers: Essential for removing grease, oil, and other contaminants from parts before coating. Make sure you’re using a solvent compatible with the materials you’re working with. I usually keep a few different types on hand, just in case.
- Brushes and Scrapers: For manual cleaning of equipment and parts. A good set of brushes in various sizes can get into those hard-to-reach spots. Stiff-bristled brushes are great for removing stubborn residue, while softer brushes are ideal for more delicate surfaces.
- Shop Vacuums: A shop vacuum with a HEPA filter is a must-have for collecting loose powder and dust. Regular vacuuming prevents powder buildup, which can be a fire hazard and affect the performance of your equipment. I try to vacuum at least once a week, or more often if I’m doing a lot of coating.
- Cleaning Rags and Wipes: For wiping down surfaces and cleaning up spills. I prefer lint-free rags to avoid leaving any fibers behind. A stack of disposable wipes is also handy for quick cleanups.
- Alkaline Cleaners:An alkaline cleaner is great for removing oil, grease, and soils and will cope readily with the heaviest contaminants.
Maintaining a clean workspace is an ongoing process. It’s not just about cleaning up after a job; it’s about creating a clean environment that promotes efficiency and quality. A little bit of effort each day can make a big difference in the long run.
Keeping your gear clean is super important for it to last a long time and work its best. We have all the right cleaning stuff to help you take care of your equipment. Want to see what we offer? Check out our full list of cleaning supplies on our website!
Conclusion
So, there you have it. Getting a good powder coat isn’t just about having some powder and a spray gun. It’s really about having the right setup, from start to finish. Each piece of equipment plays a part in how well the final product looks and holds up. If you take the time to pick out good components and keep them in working order, you’ll see a big difference in your results. It’s like anything else: the better your tools, the better your work. And when it comes to powder coating, that means a nice, smooth finish every time.
Frequently Asked Questions
Why does my powder coating look like an orange peel?
If your powder coating looks like an orange peel, it means the powder didn’t spread out smoothly. This can happen if the oven isn’t hot enough, the powder itself isn’t right, or if the layer of powder is too thick or too thin. You might need to check your oven settings, talk to your powder supplier, or adjust how much powder you’re putting on.
What causes powder coating to not stick to the parts?
When the powder doesn’t stick well, it’s usually because the parts weren’t cleaned properly before coating, or the powder didn’t bake long enough in the oven. Make sure your parts are super clean, and check that your oven is set to the right temperature and time for the powder you’re using.
Why is my powder coating too glossy?
If your powder coating is too shiny when it should be dull, it might be because the oven wasn’t hot enough or the parts didn’t stay in the oven long enough. This can also happen if the powder itself isn’t meant to be dull, or if the layer is too thick. Try increasing the oven temperature or baking time, and always check the powder’s instructions.
What causes cloudiness or uneven spots in the coating?
If you see spots or an uneven look, it could be from dirt in the air, water on the parts, or issues with how the powder is sprayed. Make sure your work area is clean, the parts are dry, and check your spray gun settings to make sure the powder is coming out evenly.
What happens if the powder coating is too thick?
Having a layer of powder that’s too thick can lead to problems like orange peel or small holes. This usually happens if too much powder is delivered to the gun, or if the spray gun is too close to the part. Try reducing the powder flow or moving the gun a bit further away.
How important is regular maintenance for powder coating equipment?
Good maintenance is super important! It keeps your equipment running smoothly, helps avoid problems, and makes sure you get a great finish every time. Regular checks and cleaning can save you a lot of trouble and money in the long run.